Archive for category SOFTWARE
>How To Hack Computers
>
 |
| Hacking guide |
 |
| Hacking E book |
 |
| Hacking turorials |
>Telnet Exposed
>
With no success, for the past few years, i have gathered data, and finally
know the system, its faults, capabilities, and errors.
This really should be in a text file, but. i wish this information to
be reserved for the few users on this system.


before i start, here are a few basic commands to get famialir with:
Execution syntax of command function
————————————————————————
Connect c (sp) Connects to a host (opt)
Status stat Displays network port add
Full-Duplex full network echo
Half-Duplex half Termnial echo
Mail
or
Telemail mail telemail telemail
set Parmaters set (sp) 2:0,3:2 Select Pad Parameters
Read Paramaters par? par?(sp)2:0,3:2 display pad
Set and read
Paramaters set?(sp)2:0,3:2
escape escape from data modew
File Trasnfer dtape Prepares network for bulk
continue cont
disconnect bye or d
hang up hangup
terminial term(sp)d1 Set TERM
test
test(sp)char
test(sp)echo
test(sp)triangle
this is the end of the commands, view next msg for useage:
Trap and pipe x.25 prot. (telenet)…
Please note this is a very difficult transaction… The following
flow chart, will only work on a machine with atleast 10 Mhz..
However, an account on a unix, with cu capabilities will also work..
Package networking, is exactly what it means..
before, i go into detail, let me give you and over view…
————-
Host
————-
!
!
!
!
—————–
telenet, remote
$ divertor, and
pacakge.
——————
!
!
———————
! ! ! !
! ! ! !
u u u u
s s s s
e e e e
r r r r
s s s s
If you notice carefully, there is online to the host and 4 users. That
is how its packaged, for instance the first 100 mills. will be from user
on then two etc.. The way telenet can tell which is user is which, is
simply by the time. Time is of the essense. data is constantly been
packed, anywhere from 100 mils. to 760 mils. The trick to trap tapping
and piping, a lead off of telenet, is to have as system running four
proccewss and the same time, and have a master prgm. that switch’s at
the appropriate delays… As you can see this is where a 10 Mhz +
system, is needed.
On the host end.
The host end consists of three things..
I doubt know one needs a lesson on the first two, but lets take a look
at telenets, “weakest” link..
Network Pad
———-
There are three types of network pads a 4 pad 12 pad and 32 pad
They really do not make a diffrence, it only changes the amount
of users, capable of using on line..
example. if you have a 4 network pad. you system will be able to handle
four users from telenet etc…
The network pad is Such a piece of”shit you have know idea..
All parameters are set remotly by a telenet eng..
This is important…
If the pad is every shutoff all parameters are lost.. and an eng. must
reload the pad.. (again, this is done remotly)
to give you a small ifea, of$the amount of programing in thms pad (which
i might add has over 2 megs of internal RAM) for an eng. to upload it ct
9600 bps.. it took approx 38 mins.
The Pad is not a computer, if ytou think about it though, if your
traveling at 1200 on telenet, your actually travling at 9600 and back to
1200.. when x.25 is unpacked..
How is the pad set remotly..
lets take an example…

c 2122
now c 2122 /(?this is an example)
ha four nodes its a siml divester to the next node. however you can
specify, the node you want
c”212.01
c 212.02
etc….
nodes can also”be stated as 2122a is the same as “2122.01
and 2122.03 is the same as 2122c
Now that we know how to access the indiv. nodes. let me show you a small
secret…
Theres a programing node.. so an eng. can upload, to your network pad..
every address has it…
it always ends in 99
so, if i wanted to trap and tap c 2122
i would enter c 2122.99
you would get a connected.. but is you notice nothin happens..
at this point do not touch any keys.. a wrong key stroke, will
most likely alert someone to your tampering..
(dont forget, all network pads have a direct alarm signle.. so follow my
directions to the t…
enter in :
with out a return.. you should get telenet
if you dont give it a min. then hit return. your actually there. but the
prompt, just didnt print.. ok..
Now type
set 15:0
when entered.. hold 15 secs.. for a time delay..
then type in cont
to continue, with the host you brokg from…..
you will get a message:
TP3005 DEBUG PORT V5.37.03
>
your now, directly accessed the network pad..
Please note some of these have passwords:
However
if your prompted for a password, of if nothing happens:
telenet has two standard passwords:
superman
represeting a male tech.
and
$ wonderwomen
repre. a woman tech..
when in your prompt is always a greater than sign:
>
type the following:
7FDS
HIT RETURN
youll get a responce: $ E 01
NOW TYPE IN:
L7FE,L,A2,R2,D
then youll get a message: R 00A626 8805
now enter ing: 40588
YOUR RESPONCE WILL BE : E 01
right now you should open at least a 640K buffer…..
now type in > R0589
YOU’LL GET A WHOLE LIST OF DATA THAT IS CURRENTLY CROSSING THE PADS
DUPLEX.
ONE LINE WILL LOOK LIKE THIS:
R 00A625 06805FF17068703 1287100230050540 0000000000000000 FF020101000000
þ”&]%%+f! ! )19AIQYai
ÿIt seems that not many of you know that Telenet is connected to about 80
computer-networks in the world. No, I don’t mean 80 nodes, but 80 networks
with thousands of unprotected computers. When you call your local Telenet-
gateway, you can only call those computers which accept reverse-charging-calls.
If you want to call computers in foreign countries or computers in USA which
do not accept R-calls, you need a Telenet-ID. Did you ever notice that you can
type ID XXXX when being connected to Telenet? You are then asked for the
password. If you have such a NUI (Network-User-ID) you can call nearly every
host connected to any computer-network in the world. Here are some examples:
026245400090184 is a VAX in Germany (Username: DATEXP and leave mail for
CHRIS !!!)
0311050500061 is the Los Alamos Integrated computing network (One of the
hosts connected to it is the DNA (Defense Nuclear Agency)!!!)
0530197000016 is a BBS in New Zealand
024050256 is the S-E-Bank in Stockholm, Sweden (Login as GAMES !!!)
02284681140541 CERN in Geneva in Switzerland (one of the biggest nuclear
research centers in the world) Login as GUEST
0234212301161 A Videotex-standard system. Type OPTEL to get in and
use the ID 999_ with the password 9_
0242211000001 University of Oslo in Norway (Type LOGIN 17,17 to play
the Multi-User-Dungeon !)
0425130000215 Something like ITT Dialcom, but this one is in Israel !
ID HELP with password HELP works fine with security level 3
0310600584401 is the Washington Post News Service via Tymnet (Yes, Tymnet
is connected to Telenet, too !) ID and Password is: PETER
You can read the news of the next day !
The prefixes are as follows:
02624 is Datex-P in Germany
02342 is PSS in England
03110 is Telenet in USA
03106 is Tymnet in USA
02405 is Telepak in Sweden
04251 is Isranet in Israel
02080 is Transpac in France
02284 is Telepac in Switzerland
02724 is Eirpac in Ireland
02704 is Luxpac in Luxembourg
05252 is Telepac in Singapore
04408 is Venus-P in Japan
…and so on… Some of the countries have more than one packet-switching-
network (USA has 11, Canada has 3, etc).
OK. That should be enough for the moment. As you see most of the passwords
are very simple. This is because they must not have any fear of hackers. Only
a few German hackers use these networks. Most of the computers are absolutely
easy to hack !!!
So, try to find out some Telenet-ID’s and leave them here. If you need more
numbers, leave e-mail.
I’m calling from Germany via the German Datex-P network, which is similar to
Telenet. We have a lot of those NUI’s for the German network, but none for
a special Tymnet-outdial-computer in USA, which connects me to any phone #.
CUL8R, Mad Max
PS: Call 026245621040000 and type ID INF300 with password DATACOM to get more
Informations on packet-switching-networks !
PS2: The new password for the Washington Post is KING !!!!
>how to Create Config.sys and autoexec.bat
>
files like config.sys and autoexec.bat files, well heres it…
Even if u dont have a dos boot disk u can work ur way
to some extent.
At c:\ prompt
type
copy con config.sys
devicehigh=c:\dos\himem.sys
device=c:\dos\setver.exe
devicehigh=c:\dos\emm386.exe ram
dos=high,umb
last drive=z
then press CTRL + z
press enter
Config.sys file will be created.

Similarly u can create autoexec.bat
@echo off
prompt=$P$G
path=c:\dos;c:\
lh mouse
lh doskey
Press CTRL + Z
>What is DVD Regions
>
 |
| DVD Regions Code |
 |
| Xbox 360 HD Dvd Player |
 |
| Full HD Player 1080p |
The DVD region code identifies a DVD’s compatibility with the players typically sold in a particular region.
The following graphic shows the approximate location of each region.
Region 0 (or “region free”) is compatible with DVD players from any region.
The majority of all current titles play only in one specific region unless otherwise noted. DVDs sold by Amazon.co.uk are encoded for Region 2 or Region 0. Region 2 DVDs may not work on DVD players in other countries.
Region 1 DVDs sold by Marketplace sellers
Region 1 discs are intended for use with standard DVD players in North America (Canada and the USA). In most instances they can also be played on compatible “multi-region” DVD players (also known as “chipped” or “region-free” players).
They also require an NTSC-compatible television. NTSC is the standard picture format in North America, and differs from the PAL format adopted in Britain and Europe. Region 1 DVDs are usually presented in NTSC format, so you should ensure that your TV is capable of reading the NTSC signal before purchasing Region 1 DVDs.
Regional Coding Enhancement (RCE)


Regional Coding Enhancement (RCE) has been added by some film studios (specifically Warner and Columbia) to selected Region 1 DVDs, with the intention of preventing these discs from playing on some multi-region DVD players. We are therefore unable to guarantee that all Region 1 discs will be compatible with all multi-region players.
Global DVD region countries
This is not a definitive list and is intended only as a guide.
Region 1 – US, US Territories and Canada
American Samoa, Canada, Guam, Palau, Mariana Islands, Marshall Islands, Puerto Rico, Micronesia, United States, U.S. Virgin Islands
Region 2 – UK, Europe, Japan, South Africa and Middle East
Albania, Andorra, Austria, Bahrain, Belgium, Bosnia and Herzegovina, Bulgaria, Croatia, Czech Republic, Denmark, Egypt, Finland, France, Germany, Gibraltar, Greece, Greenland, Hungary, Iceland, Iran, Iraq, Ireland, Israel, Italy, Japan, Jordan, Kuwait, Lebanon, Liechtenstein, Luxembourg, Macedonia, Malta, Moldova, Monaco, Netherlands, Norway, Oman, Poland, Portugal, Qatar, Romania, San Marino, Saudi Arabia, Slovakia, Slovenia, South Africa, Spain, Sweden, Switzerland, Syria, United Arab Emirates, United Kingdom, Vatican City, Yemen, Yugoslavia
Region 3 – Southeast and East Asia
Cambodia, Hong Kong, Indonesia, Laos, Malaysia, Myanmar, Phillipines, South Korea, Taiwan, Thailand, Vietnam
Region 4 – Australia, New Zealand, Central and South America
Antigua, Argentina, Aruba, Australia, Bahamas, Barbados, Barbuda, Belize, Bolivia, Brazil, Chile, Colombia, Costa Rica, Cuba, Dominica, Dominican Republic, Ecuador, El Salvador, Falkland Islands, French Guiana, Grenada, Guatemala, Guyana, Haiti, Honduras, Jamaica, Mexico, New Guinea, New Zealand, Nicaragua, Panama, Paraguay, Peru, Suriname, Trinidad, Tobago, Uruguay
Region 5 – Former Soviet Union, Indian sub-continent, Africa, North Korea and Mongolia
Afghanistan, Algeria, Angola, Bangladesh, Belarus, Benin, Botswana, Burkina Faso, Burundi, Cameroon, Cape Verde, Central African Republic, Chad, Comoros, Congo, Djibouti, Equatorial Guinea, Eritrea, Estonia, Ethiopia, Gabon, Gambia, Georgia, Ghana, Guinea, Guinea-Bissau, India, Ivory Coast, Kazakhstan, Kenya, Latvia, Lesotho, Liberia, Libya, Lithuania, Madagascar, Malawi, Mali, Mauritania, Mauritius, Mongolia, Morocco, Mozambique, Namibia, Niger, Nigeria, North Korea, Pakistan, Russia, Rwanda, Sao Tome and Principe, Senegal, Seychelles, Sierra Leone, Somalia, Sri Lanka, St. Helena, Sudan, Tanzania, Togo, Tunisia, Turkmenistan, Uganda, Ukraine, Uzbekistan, Zambia, Zimbabwe
Region 6 – China
China
Region 7 – Reserved for future use
Region 8 – International Territories (ships, planes, etc)
>How to do a high Quality DivX rip
>
 |
DivX Player ![Roxio Easy Media Creator Suite 9 [OLD VERSION]](http://ws.amazon.com/widgets/q?MarketPlace=US&ServiceVersion=20070822&ID=AsinImage&WS=1&Format=_SL160_&ASIN=B000HJQYE0&tag=secure0b9-20) |
First and foremost, go to
and go to their downloads section.
get the following files:
under Audio:
Besweet
Besweet GUI
Under Codecs:
DivX 5.2.1 Pro


Under Divx/Mpeg-4 encoders:
Nandub 1.0RC2
then get this:
http://www.dvd-digest.tv/downloads/files/virtualdub/vdub_pack-145.exe
alternatively, get any version of virtualdub that includes mp3 support.
these are all the required tools, there are ways with fewer items, but they produce very inferior outputs. Besides, after you get used to it, the whole process is really easy.
Okay, first and foremost, pull out Nandub. This is the step that takes the longest, as well as where you will make most of your decisions. I am going to assume that you are making a 1 cd rip. If you do what is in this faq, there won’t be much reason to do anything else. Twisted Evil
First of all, run Nandub . It will pop up a dialogue box, and want to know if you are making a new project or resuming an old. New, of course. Give it a name and tell fairuse where you want it to store its data. Fairuse is about to rip the entire movie to your harddrive(nice if you want to go rent a movie and return it the next day).
Then it will ask for your DVD drive with a dvd in it. give it. Then, select which video stream you want. This is usually pretty obvious as the movie stream is the one that is an hour or so long. If there are two of these, check out the other tags. which languages and so on. worst case senario is that you have to trial and error. but that is rare. choose the long stream and hit next.
This is where Nandub rips everything to your hard drive. depending on the speed of various components in your computer, and the length of the movie, this could take a while. let it finish. and then move on.
Once all that is done, the really important screen pops up. this is where you set resolutions and video length. first, cut off the ending credits with the slider, but DO NOT mess with the beginning, as the sound and video frames need to start at the same point for sync. Then hit auto set for the cropping region, this is usually just fine. Then decide whether or not you want subtitles, which would be the subpicture stream. When you’re done, hit next.
Set the field mode to IVTC. This will give you better quality for size, as it runs at 24 frames instead of 30, due to the nature of divx, there won’t be any noticeable difference in quality, but 6 less frames to deal with each second(and to store data for) really add up. Besides this is the correct mode for all movies anyway. NExt.
This is where you set FINAL file size, including audio, for 1 cd rip, set to 690, for 2, set to double that. Then follow the directions they give you and choose a final resolution that has between a 120:1 and 150:1 (if possible, sometimes the movie is compression ratio. NEXT!


This screen is where you determine quality. The autoadd button is usefull, and will give you decent quality, with 4 encodings. What this does is encode the movie 4 times, and then mix the frames to creat the final encoding, with the most efficient possible encoding for each frame. which is how we get bad ass quality for a single cd. I usually go for 8 encodings, as on my athlon 1600+ this rarely takes more than 8 hours to do, so I just go to sleep, wake up, and its done.
Then add the audio encoding that you want.
Hit next.
And let the bastard fly. Depending on what you set, and your computer, this could take from a few hours to a few days. CPU’s of 1.2Ghz+ are nice right about here. You can do stuff while this is going on, but it makes things take much longer.
In the end you will have a bunch of encodings in the folder you specified at the beginning, the 4+ you chose and the final. You will also have an AC3 stream. Take the final AVI and toss it someplace to await the rest of the audio work you have to do, and you can erase the other encodings, freeing up a few gigs in the process of space.
NEXT: AUDIO
Ok, this is where Besweet comes in.
Extract BeSweet and the GUI into the same folder. Now Run the GUI.
At the top there are three fields. One for BeSweet which you should point at the besweet.exe that you should have unzipped to the same directory you are running the Gui from, A field for the AC3 stream, which is in the folder where you sent the encoded video from Fairuse, and an output mp3. The output mp3 has to be an existing file, so make a text file, rename it (yourmovie).mp3 and just say yeah, its cool to change the extension and make things weird. besweet will overwrite it so don’t worry. point the third field at that file. The default values for stuff should be fine. but to make sure go to Azid 1(on the left) and select stereo, and then go to Lame 2 and select constant bit rate, and 128(assuming that is what you want). then click on besweet again, and finally, click on AC3 to MP3.
Let the bastard fly.
Now. When its done you should have an mp3 that is the entire soundtrack for the movie. This is where virtualdub comes in. run the virtualdub mp3 version. go to File:open video file and select the final encoding that you had from way back. Then go to audio and select mp3 audio. it will ask you for the file, give it the mp3. Go to audio again and make sure direct stream copy is selected. Then go to video and make sure that direct stream copy is also selected. Finally go to file again and SAVE AVI. give it a file name and let the bastard fly. This final file is your movie. Beautiful and glorious. Congratulations, its a DivX rip. Aren’t you proud. burn to cd, and give copies to all your friends.
Note: These is a RIP
>How To Lan Computers
>


once you have done this restat both computers.
Now;
Open Windows Start menu on one computer.
Open Control Panel.
Classic view: Open Network Connections
Double-click on Local Area Connection which is your Internet connection.
Click Properties.
Then under the general tab, it will say in the second box Down ‘ Internet Protocol TCP/IP’
Click on that and then click Properties
Then another window should apear and you need to select ‘use the following IP address’ after you have selected this you need to type in the following;
IP Address: 192.168.1.1
Subnet Mask: 255.255.255.0
Default Gatewat: 192.168.1.1
Then click save.


One the other computer, do the exact same but instead of naming your IP Address 192.168.1.1 name it 192.168.1.2 and then fill in the same subnet mask and the same default gateway. Make sure the default gate way is 192.168.1.1
Then restart both of your computers and when it boots up they will be connected. To show that they are go to Start/ control Panel/ Network Connections/ then in the side panel it will say ‘My Network Places’ click on that then again in the side pannel click ‘View work group computers’ and both of your computers will be there allowing you to share files 😀


>How to rip Dynamic Flash Template
>

Sample dynamic flash template from TM website
Sothink SWF Decompiler
Macromedia Flash
Yourself
1. browse or search your favorite dynamic flash template in TM website. If you got one… click the “view” link and new window will open with dynamic flash.. loading…
2. If the movie fully loaded, click View -> Source in your browser to bring the source code of the current page and in the source code, search for “IFRAME” and you will see the iframe page. In this example were going to try the 7045 dynamic template. get the URL(ex.
http://images.templatemonster.com/screenshots/7000/7045.html) then paste it to your browser… easy eh? wait! dont be to excited… erase the .html and change it to swf then press enter then you’ll see the flash movie again icon_smile.gif.
3. copy the URL and download that SWF file.. use your favorite download manager.. mine I used flashget icon_smile.gif NOTE: dont close the browser we may need that later on.
4. open your Sothink SWF decompiler… click “Quick Open” then browse where you download your SWF/movie file. Click Export FLA to export your SWF to FLA, in short, save it as FLA icon_smile.gif
5. Open your Macromedia FLash and open the saved FLA file. press Control+Enter or publish the file… then wallah! the output window will come up with “Error opening URL blah blah blah…” dont panic, that error will help you where to get the remaining files.
![Adobe Flash Pro CS5 Student & Teacher Edition [Mac]](http://ws.amazon.com/widgets/q?MarketPlace=US&ServiceVersion=20070822&ID=AsinImage&WS=1&Format=_SL160_&ASIN=B003D8ZBVO&tag=secure0b9-20)


6. Copy the first error, example: “7045_main.html” then go back to your browser and replace the 7045.swf to 7045_main.html press enter and you’ll see a lot of text… nonsense text icon_lol.gif that text are your contents…


NOTE: when you save the remaining files dont forget to save with underscore sign (_) in the front on the file without the TM item number (e.g. 7045) if it is html save it as “_main.html” and same with the image save it as “_works1.jpg” save them where you save the FLA and SWF files. Continue browsing the file inside Flash application so you can track the remaining files… do the same until you finish downloading all the remaining the files.
>What is DirectX
>
Gaming and multimedia applications are some of the most satisfying programs you can get for your PC, but getting them to run properly isn’t always as easy as it could be. First, the PC architecture was never designed as a gaming platform. Second, the wide-ranging nature of the PC means that one person’s machine can be different from another. While games consoles all contain the same hardware, PCs don’t: the massive range of difference can make gaming a headache.
To alleviate as much of the pain as possible, Microsoft needed to introduce a common standard which all games and multimedia applications could follow – a common interface between the OS and whatever hardware is installed in the PC, if you like. This common interface is DirectX, something which can be the source of much confusion.
DirectX is an interface designed to make certain programming tasks much easier, for both the game developer and the rest of us who just want to sit down and play the latest blockbuster. Before we can explain what DirectX is and how it works though, we need a little history lesson.
![]()
DirectX history
Any game needs to perform certain tasks again and again. It needs to watch for your input from mouse, joystick or keyboard, and it needs to be able to display screen images and play sounds or music. That’s pretty much any game at the most simplistic level.
Imagine how incredibly complex this was for programmers developing on the early pre-Windows PC architecture, then. Each programmer needed to develop their own way of reading the keyboard or detecting whether a joystick was even attached, let alone being used to play the game. Specific routines were needed even to display the simplest of images on the screen or play a simple sound.
Essentially, the game programmers were talking directly to your PC’s hardware at a fundamental level. When Microsoft introduced Windows, it was imperative for the stability and success of the PC platform that things were made easier for both the developer and the player. After all, who would bother writing games for a machine when they had to reinvent the wheel every time they began work on a new game? Microsoft’s idea was simple: stop programmers talking directly to the hardware, and build a common toolkit which they could use instead. DirectX was born.
How it works
At the most basic level, DirectX is an interface between the hardware in your PC and Windows itself, part of the Windows API or Application Programming Interface. Let’s look at a practical example. When a game developer wants to play a sound file, it’s simply a case of using the correct library function. When the game runs, this calls the DirectX API, which in turn plays the sound file. The developer doesn’t need to know what type of sound card he’s dealing with, what it’s capable of, or how to talk to it. Microsoft has provided DirectX, and the sound card manufacturer has provided a DirectX-capable driver. He asks for the sound to be played, and it is – whichever machine it runs on.
From our point of view as gamers, DirectX also makes things incredibly easy – at least in theory. You install a new sound card in place of your old one, and it comes with a DirectX driver. Next time you play your favourite game you can still hear sounds and music, and you haven’t had to make any complex configuration changes.
Originally, DirectX began life as a simple toolkit: early hardware was limited and only the most basic graphical functions were required. As hardware and software has evolved in complexity, so has DirectX. It’s now much more than a graphical toolkit, and the term has come to encompass a massive selection of routines which deal with all sorts of hardware communication. For example, the DirectInput routines can deal with all sorts of input devices, from simple two-button mice to complex flight joysticks. Other parts include DirectSound for audio devices and DirectPlay provides a toolkit for online or multiplayer gaming.
DirectX versions
The current version of DirectX at time of writing is DirectX 10.0. This runs on all versions of Windows from Windows 98 up to and including Windows Server 2003 along with every revision in between. It doesn’t run on Windows 95 though: if you have a machine with Windows 95 installed, you’re stuck with the older and less capable 8.0a. Windows NT 4 also requires a specific version – in this case, it’s DirectX 3.0a.Xp,vista,Windows 7 Direct X 10,11…

With so many versions of DirectX available over the years, it becomes difficult to keep track of which version you need. In all but the most rare cases, all versions of DirectX are backwardly compatible – games which say they require DirectX 7 will happily run with more recent versions, but not with older copies. Many current titles explicitly state that they require DirectX 9, and won’t run without the latest version installed. This is because they make use of new features introduced with this version, although it has been known for lazy developers to specify the very latest version as a requirement when the game in question doesn’t use any of the new enhancements. Generally speaking though, if a title is version locked like this, you will need to upgrade before you can play. Improvements to the core DirectX code mean you may even see improvements in many titles when you upgrade to the latest build of DirectX. Downloading and installing DirectX need not be complex, either.
Upgrading DirectX
All available versions of Windows come with DirectX in one form or another as a core system component which cannot be removed, so you should always have at least a basic implementation of the system installed on your PC. However, many new games require the very latest version before they work properly, or even at all.
Generally, the best place to install the latest version of DirectX from is the dedicated section of the Microsoft Web site, which is found at http://www.microsoft.com/windows/directx. As we went to press, the most recent build available for general download was DirectX 9.0b. You can download either a simple installer which will in turn download the components your system requires as it installs, or download the complete distribution package in one go for later offline installation.
Another good source for DirectX is games themselves. If a game requires a specific version, it’ll be on the installation CD and may even be installed automatically by the game’s installer itself. You won’t find it on magazine cover discs though, thanks to Microsoft’s licensing terms.
Diagnosing problems
Diagnosing problems with a DirectX installation can be problematic, especially if you don’t know which one of the many components is causing your newly purchased game to fall over. Thankfully, Microsoft provides a useful utility called the DirectX Diagnostic Tool, although this isn’t made obvious. You won’t find this tool in the Start Menu with any version of Windows, and each tends to install it in a different place.
The easiest way to use it is to open the Start Menu’s Run dialog, type in dxdiag and then click OK. When the application first loads, it takes a few seconds to interrogate your DirectX installation and find any problems. First, the DirectX Files tab displays version information on each one of the files your installation uses. The Notes section at the bottom is worth checking, as missing or corrupted files will be flagged here.
The tabs marked Display, Sound, Music, Input and Network all relate to specific areas of DirectX, and all but the Input tab provide tools to test the correct functioning on your hardware. Finally, the More Help tab provides a useful way to start the DirectX Troubleshooter, Microsoft’s simple linear problem solving tool for many common DirectX issues.
>What is DirectX
>
Gaming and multimedia applications are some of the most satisfying programs you can get for your PC, but getting them to run properly isn’t always as easy as it could be. First, the PC architecture was never designed as a gaming platform. Second, the wide-ranging nature of the PC means that one person’s machine can be different from another. While games consoles all contain the same hardware, PCs don’t: the massive range of difference can make gaming a headache.
To alleviate as much of the pain as possible, Microsoft needed to introduce a common standard which all games and multimedia applications could follow – a common interface between the OS and whatever hardware is installed in the PC, if you like. This common interface is DirectX, something which can be the source of much confusion.
DirectX is an interface designed to make certain programming tasks much easier, for both the game developer and the rest of us who just want to sit down and play the latest blockbuster. Before we can explain what DirectX is and how it works though, we need a little history lesson.
![]()
DirectX history
Any game needs to perform certain tasks again and again. It needs to watch for your input from mouse, joystick or keyboard, and it needs to be able to display screen images and play sounds or music. That’s pretty much any game at the most simplistic level.
Imagine how incredibly complex this was for programmers developing on the early pre-Windows PC architecture, then. Each programmer needed to develop their own way of reading the keyboard or detecting whether a joystick was even attached, let alone being used to play the game. Specific routines were needed even to display the simplest of images on the screen or play a simple sound.
Essentially, the game programmers were talking directly to your PC’s hardware at a fundamental level. When Microsoft introduced Windows, it was imperative for the stability and success of the PC platform that things were made easier for both the developer and the player. After all, who would bother writing games for a machine when they had to reinvent the wheel every time they began work on a new game? Microsoft’s idea was simple: stop programmers talking directly to the hardware, and build a common toolkit which they could use instead. DirectX was born.
How it works
At the most basic level, DirectX is an interface between the hardware in your PC and Windows itself, part of the Windows API or Application Programming Interface. Let’s look at a practical example. When a game developer wants to play a sound file, it’s simply a case of using the correct library function. When the game runs, this calls the DirectX API, which in turn plays the sound file. The developer doesn’t need to know what type of sound card he’s dealing with, what it’s capable of, or how to talk to it. Microsoft has provided DirectX, and the sound card manufacturer has provided a DirectX-capable driver. He asks for the sound to be played, and it is – whichever machine it runs on.
From our point of view as gamers, DirectX also makes things incredibly easy – at least in theory. You install a new sound card in place of your old one, and it comes with a DirectX driver. Next time you play your favourite game you can still hear sounds and music, and you haven’t had to make any complex configuration changes.
Originally, DirectX began life as a simple toolkit: early hardware was limited and only the most basic graphical functions were required. As hardware and software has evolved in complexity, so has DirectX. It’s now much more than a graphical toolkit, and the term has come to encompass a massive selection of routines which deal with all sorts of hardware communication. For example, the DirectInput routines can deal with all sorts of input devices, from simple two-button mice to complex flight joysticks. Other parts include DirectSound for audio devices and DirectPlay provides a toolkit for online or multiplayer gaming.
DirectX versions
The current version of DirectX at time of writing is DirectX 10.0. This runs on all versions of Windows from Windows 98 up to and including Windows Server 2003 along with every revision in between. It doesn’t run on Windows 95 though: if you have a machine with Windows 95 installed, you’re stuck with the older and less capable 8.0a. Windows NT 4 also requires a specific version – in this case, it’s DirectX 3.0a.Xp,vista,Windows 7 Direct X 10,11…
With so many versions of DirectX available over the years, it becomes difficult to keep track of which version you need. In all but the most rare cases, all versions of DirectX are backwardly compatible – games which say they require DirectX 7 will happily run with more recent versions, but not with older copies. Many current titles explicitly state that they require DirectX 9, and won’t run without the latest version installed. This is because they make use of new features introduced with this version, although it has been known for lazy developers to specify the very latest version as a requirement when the game in question doesn’t use any of the new enhancements. Generally speaking though, if a title is version locked like this, you will need to upgrade before you can play. Improvements to the core DirectX code mean you may even see improvements in many titles when you upgrade to the latest build of DirectX. Downloading and installing DirectX need not be complex, either.
Upgrading DirectX
All available versions of Windows come with DirectX in one form or another as a core system component which cannot be removed, so you should always have at least a basic implementation of the system installed on your PC. However, many new games require the very latest version before they work properly, or even at all.
Generally, the best place to install the latest version of DirectX from is the dedicated section of the Microsoft Web site, which is found at http://www.microsoft.com/windows/directx. As we went to press, the most recent build available for general download was DirectX 9.0b. You can download either a simple installer which will in turn download the components your system requires as it installs, or download the complete distribution package in one go for later offline installation.
Another good source for DirectX is games themselves. If a game requires a specific version, it’ll be on the installation CD and may even be installed automatically by the game’s installer itself. You won’t find it on magazine cover discs though, thanks to Microsoft’s licensing terms.
Diagnosing problems
Diagnosing problems with a DirectX installation can be problematic, especially if you don’t know which one of the many components is causing your newly purchased game to fall over. Thankfully, Microsoft provides a useful utility called the DirectX Diagnostic Tool, although this isn’t made obvious. You won’t find this tool in the Start Menu with any version of Windows, and each tends to install it in a different place.
The easiest way to use it is to open the Start Menu’s Run dialog, type in dxdiag and then click OK. When the application first loads, it takes a few seconds to interrogate your DirectX installation and find any problems. First, the DirectX Files tab displays version information on each one of the files your installation uses. The Notes section at the bottom is worth checking, as missing or corrupted files will be flagged here.
The tabs marked Display, Sound, Music, Input and Network all relate to specific areas of DirectX, and all but the Input tab provide tools to test the correct functioning on your hardware. Finally, the More Help tab provides a useful way to start the DirectX Troubleshooter, Microsoft’s simple linear problem solving tool for many common DirectX issues.
Save Power While using your Computer
Posted by nck12 in CRT, HARDWARE, LED, Power Saving, SOFTWARE, WINDOWS 7.LCD on November 15, 2010
Rising Power costs,it’s time to take a look at ways we can reduce our electricity consumption.To Reduce your PC’s power consumption.It’s important to get the right HARDWARE in place and tweak your settings according to your needs.
First HARDWARE , First make sure your power socket and wiring is good. you can ask an electrician to verify this.If either of these is faulty,your computer can try to sap more electricity than it needs.
Solid state drives and ultra-low voltage processors are affordable and offer significant boosts in power usage.
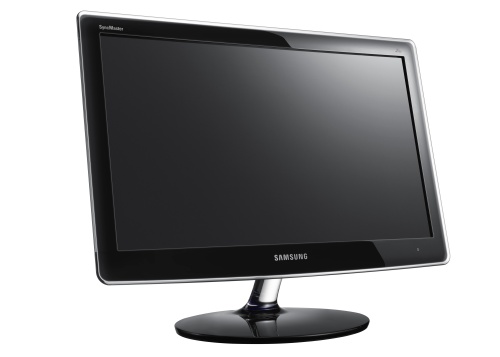 LED Monitor
When Choosing a monitor, go for an LED monitor over an LCD, and an LCD monitor over a CRT.
LED is the most power-efficient technology for screens.
 LCD Monitor ,
Reducing The brightness of the screen also reduces the power consumption.Change your monitor’s settings and reduce the brightness to a point where it’s still comfortable to read text easily.
A simple way is to open a Word Document, set the font to Arial,size 8. change the color to gray that is mid way between black and green.Now reduce your screen brightness or contrast to the pint where this text is legible.with this setting. all other text you come across should be easily readable for you.
Unplug any external devices you won’t be using such as portable hard drives, additional wireless keywords and digital cameras, if your are not using your optical drives,keep it empty and don’t forget and disc in it.
Each disc periodically asks the computer to seek it,thus taking more power.
For a SOFTWARE ,If you’re using WINDOWS 7 than Microsoft come up with a Special Power Saver Mode ,which will ensure your computer does not take up any more electricity than needed.To activate this Go to ; control panel > System and Security > Power Options and select the power saver power plan
You can further customize your power plan by clicking on change plan settings.
Not many people know that the screen saver actually guzzles up a lot up power.
-
You are currently browsing the archives for the SOFTWARE category.
